Configuring the project metadata includes the following
steps:
1) Create an empty metadata database.
2) Create a data source name (DSN) to connect to the metadata database.
3) Create the metadata shell.
Creating the Metadata Database
You can create an empty database for the metadata using any certified or supported database platform. The database platform for the data warehouse and metadata do not have to be the same.
Always its advised to go for checking the Read-me file of the version that you use & know about the certified & supported databases for Metadata. I’ve noticed people create MD db without knowing that it is supported or not. So please check well in advance.
Create a DSN to connect to Metadata Database
After you create the empty metadata database, you need to create a DSN that enables MicroStrategy to connect to it. You can create this DSN using either the MicroStrategy Connectivity Wizard or the ODBC Data Source Administrator.
Its advised to go for MicroStrategy Connectivity Wizard, as it shows you the supported & certified DB Drivers to chose. so it’ll be easy for you to create DSNs using it. However, it do not list all the certified or supported drivers. Please make note of it too.
Example :
– I will explain the ways of creating a empty database & DSN creation in windows 32 bit OS.
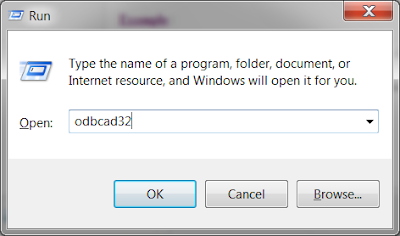
1) Goto Start -> Run -> Type “odbcad32” (or) if its 64 bit –> please goto Control Panel –> Administrative Tools –>Data Sources (ODBC)
Note: In order to access the 32-bit ODBC drivers on a 64-bit Windows machine, please run the following command:
[WINDOWS PATH]SysWOW64odbcad32.exe
In most cases, the actual command is:
C:WINDOWSSysWOW64odbcad32.exe
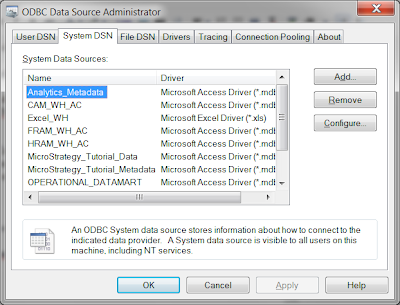
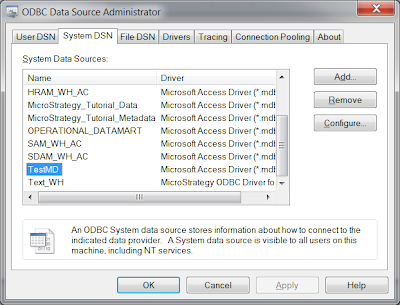
2) The ODBC window gets opened. Move to System DSN tab –> Click Add from it to create a new MD database
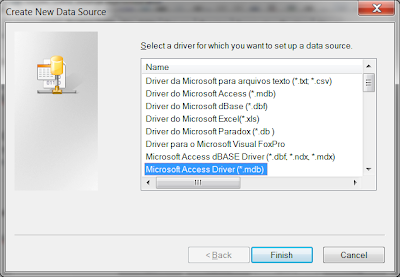
3) Here, i’ll show a sample MS Access database ( Empty Database Creation). choose the Microsoft Access Driver (*.mdb) from the driver list & Click Finish
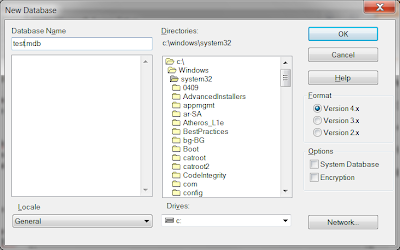
4) Give the DSN Name ” Users wish” –> Then select the MDB file if you already have, else click Create & proceed in creating the MDB file in the desired location that the user wish
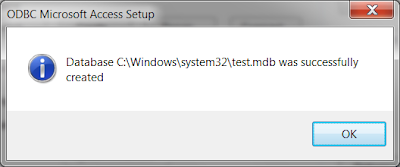
5) Once the user clicks OK, the DSN gets created with the below shown pop up.
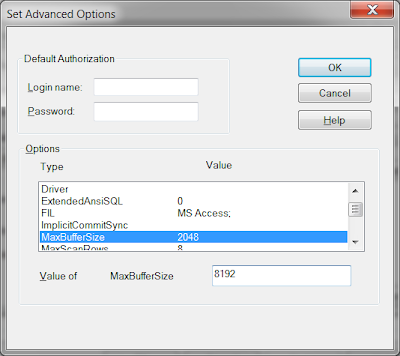
6) For MS Access, the buffer size should be increased to avoid future problems. From 2000 to 8192 is the defined value for MS Access. Also this is just the example that i explain here & not that the real time project uses MS access as MD – since its not efficient to use them. Instead go for the standard databases like DB2/SQL Server/Teradata/Etc… But take care of the buffer size recommendations for each db that you use…
7) So, once the above process is done, now the user has created the database & DSN. click Ok/Apply.
8) Then if you could go to the desired location that we had passed in above steps while creating DB – we will be able to see the mdb file created ( empty database )
By this way, the empty metadata database & DSN is created.
As said earlier, you can also use MicroStrategy Connectivity Wizard to create DSNs. Goto Start –> All Programs –> MicroStrategy –> Tools –> Connectivity Wizard. The wizard clearly guides you through the process easily to create DSNs.
Creating the Metadata Shell
The final step in configuring the project metadata is to create the metadata shell. You use the MicroStrategy Configuration Wizard to accomplish this task.
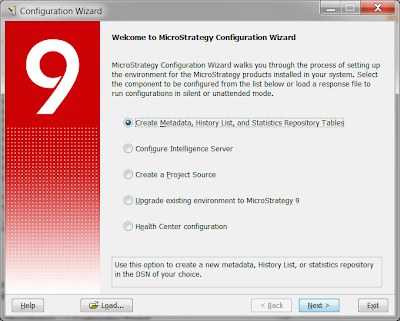
1) Goto Start –> All Programs –> MicroStrategy –> Configuration Wizard
2) Select “Create Metadata,History List, and Statistics Repository Tables” & Click Next
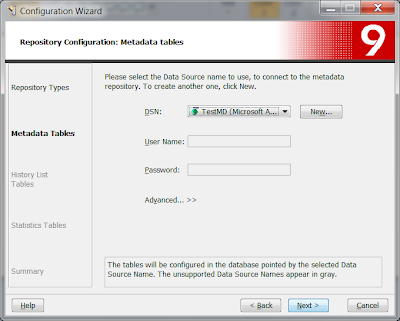
3) select “Metadata Tables” & Click Next
4) Choose the DSN that we have created “TestMD” & Click Next
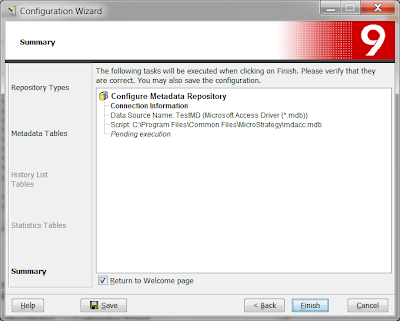
5) Click Finish –>Then it starts to execute the backend script for the database to create MD Schell tables
6) Now, if you open the MS Access (mdb) database – you’ll be able to see 26 new metadata tables( in 9.3) created
Note: A truly empty metadata should not have existing metadata tables.
Hope it helps for the day!!
Have a Good Day!!

