This is the second task involved in the Project Creation. Earlier, i discussed about the configuration of metadata which is the first step to project creation steps.
Configuring the projects includes these steps,
– Create a project source
– Create a database instance , including the database connection & Database login
Things to keep in mind:
– Before you create a project, you just need to know about the below things in place,
–> Find the database in which your tables are present ( WH )
–> Then identify the appropriate driver for the same ( certified/supported by MicroStrategy for WH )
–> Create a ODBC DSN for the same to connect to WH ( follow the same process as i said for MD DSN creation )
–> Then if your aware of DB Instance, you can create them readily inside the MicroStrategy desktop –> Administration –> Configuration Managers –> DB Instance –> Create DB Instance –> point to WH ODBC DSN –> Create database connection & Database login as well.
Create a Project Source
The project source is an object you create in MicroStrategy Desktop that enables you to connect to the metadata. You can configure a project source to connect to the metadata in one of two ways:
As i said earlier, you can create 2 tier or 3 tier projects ( Depends on your need )
–> Direct—You connect to the metadata in two-tier mode by specifying a DSN, login, and password.
–> Server—You connect to the metadata in three-tier mode by selecting an Intelligence Server that governs and validates the database connection.
Before that you need to create a project source ( which can be created using MicroStrategy configuration wizard or MicroStrategy Desktop )
1) Open MicroStrategy Desktop –> No need to login to existing project source
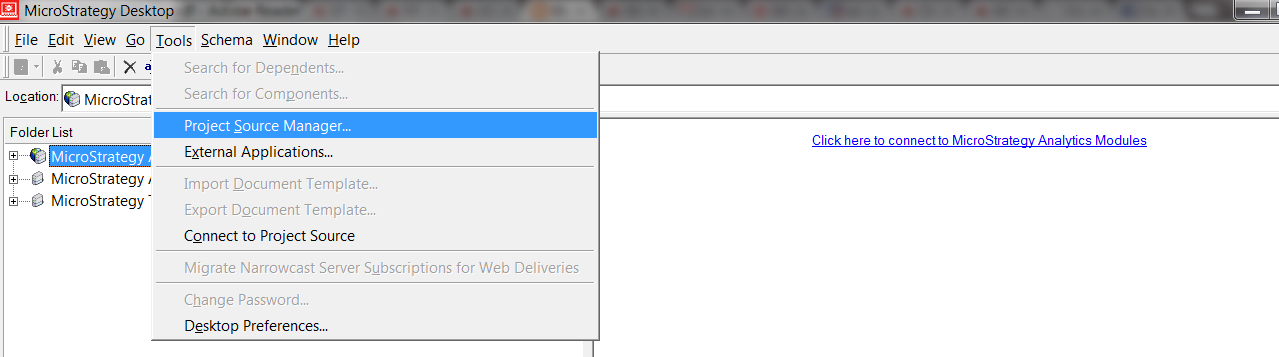
2) Goto Tools –> Project Source Manager
3) Click Add
4) Type the name of the project source & choose the connection type ( Direct or Server )
–> On the Connection tab, do one of the following:
If you selected the server connection mode, in the Server name box, type the name of the Intelligence Server you want to use.
You can also browse and select the Intelligence Server.You can change the port number and connection timeout settings if desired.
(OR)
If you selected the direct connection mode, in the ODBC DSN drop-down list, select the DSN for the metadata. ( as shown in above image )
–> In the Login id box, type the appropriate database login.
–> In the Password box, type the appropriate password.
5) Click Ok
6) In the project source manager Click OK.
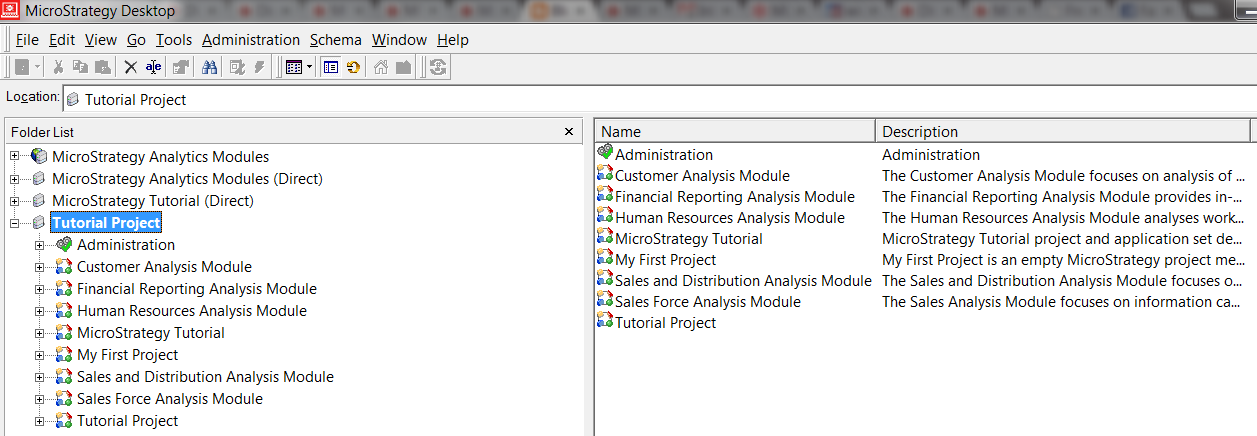
The new project source displays in the Folder List in MicroStrategy Desktop.
Server connection ( Please find below the image — with server port no/name )
Creating a database instance
After you create a project source to connect to the metadata, the next step is to establish a connection to the data warehouse in MicroStrategy Desktop. The database instance is a configuration object you create in Desktop that enables you to connect to the data warehouse. When you create a project, you specify its corresponding data warehouse by selecting the appropriate database instance. A database instance consists of a database connection, which in turn uses a specific DSN and database login.
You create the database instance and database connection inside a project source. You can use the Database Instances manager to accomplish this task. It enables you to easily create these configuration objects within any project source in Desktop.
1) Open MicroStrategy Desktop
2) In the Desktop, log in to the project source in which you want to create the database instance.
3) In the project source, expand Administration –> Configuration Managers
4) Under Configuration Managers, right-click the Database Instances manager, point to New, and select Database Instance.
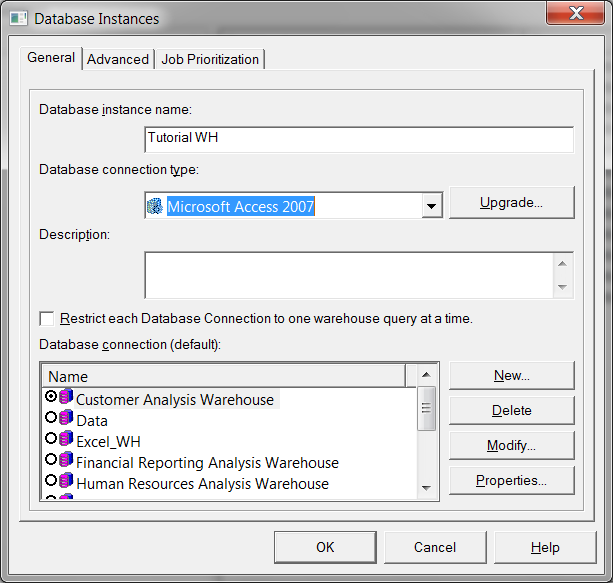
5) In the Database Instances window, on the General tab, in the Database instance name box, type the name of the database instance.
6) In the Database connection type drop-down list, select the appropriate database connection type.
7) If the connections already exists, select them else, Click New
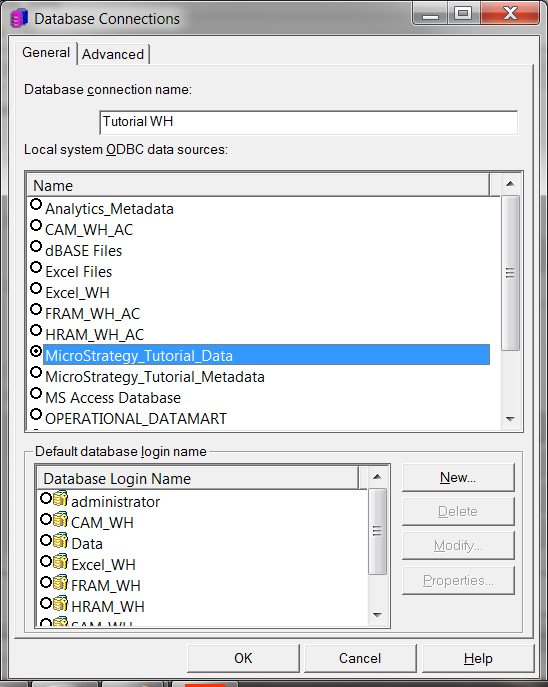
8) Give the database connection name ( custom name ) –> Select ODBC connections –> that has been created for WH connection
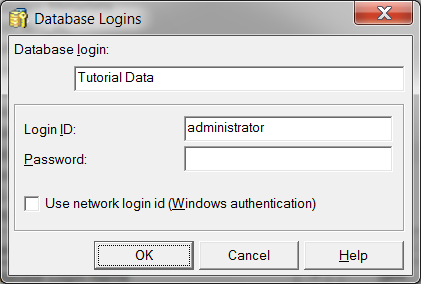
9) Choose the db login ( if it already exists), else create New –> give the name for DB Login ( custom Name ) –> Give the appropriate login id & password that is available for connecting Database.
Click Ok –> Then select the newly created “DB Logins” & “DB Connections” & Click Ok atlast.
Note: The database connection type should match the database platform of the data warehouse.
You can create any number of database instances and database connections inside the same project source. You can then use these configuration objects for any project you create in that project source.
Hope it helps for the day!!