
MicroStrategy Architect has three types of interfaces for defining projects and creating schema objects:
—> Project Creation Assistant
—> Schema object editors
—> Architect graphical interface
Project Creation Assistant –> Helps to create a project from kick start ( Creating project object/pull tables from WH/Create simple attributes/facts/etc..)
Schema Object Editors –> Helps to work with the schema objects that form the base for the whole reporting solution that we offer.. Quite often used & used for complex object creations especially..
Architect Graphical Interface –> Helps to work on with the GUI layer, where you have all architect functions ( Attribute relationship/Fact Creation/Logical size modifications/Relationship between tables check/Used & Unused tables representations/etc)
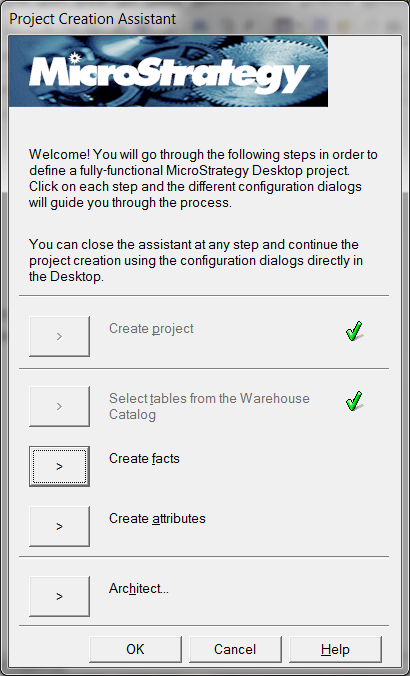
Lets discuss in deeper today about the Project Creation assistant interface
Project Creation Assistant
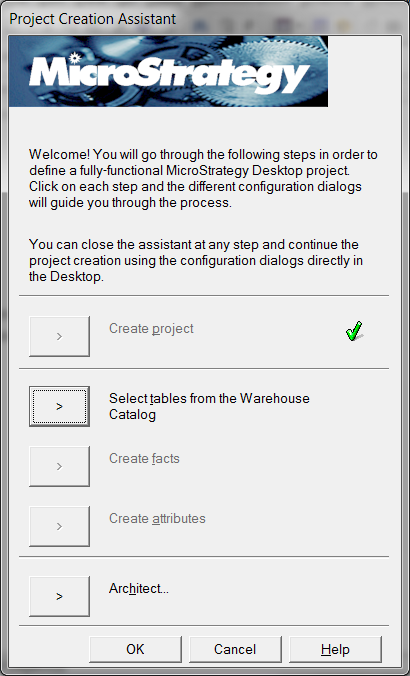
The Project Creation Assistant is a collection of wizards that leads you through the basic tasks of project creation using a very linear, step-by-step approach. It is the primary tool for bulk project creation. It enables you to perform the following tasks:
As i said earlier, they are as follows,
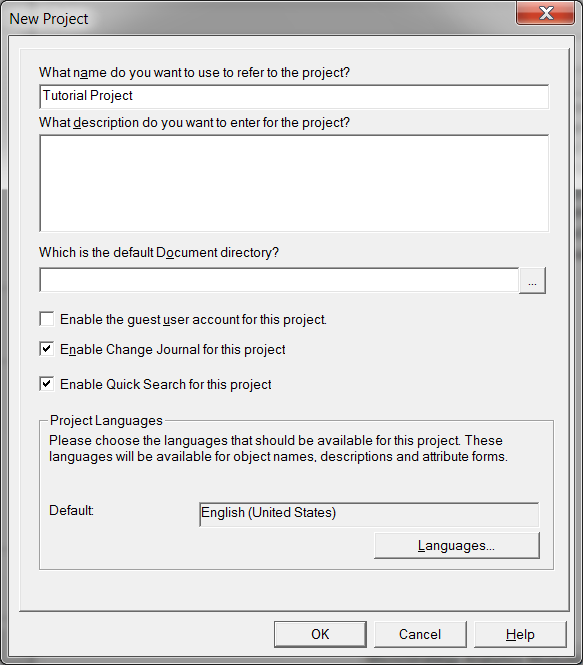
–> Create the project object
–> Select the project tables
–> Create basic facts
–> Create basic attributes and their relationships
You use the Project Creation Assistant when you initially create the project. You can then use other interfaces to create more complex facts and attributes as well as user hierarchies or to fine-tune the project.


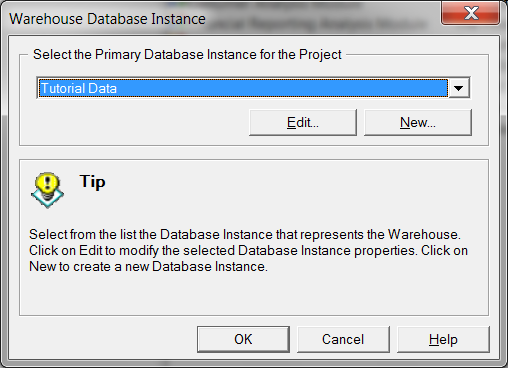
Else, Choose NEW & Create the DB Instance as shown below,
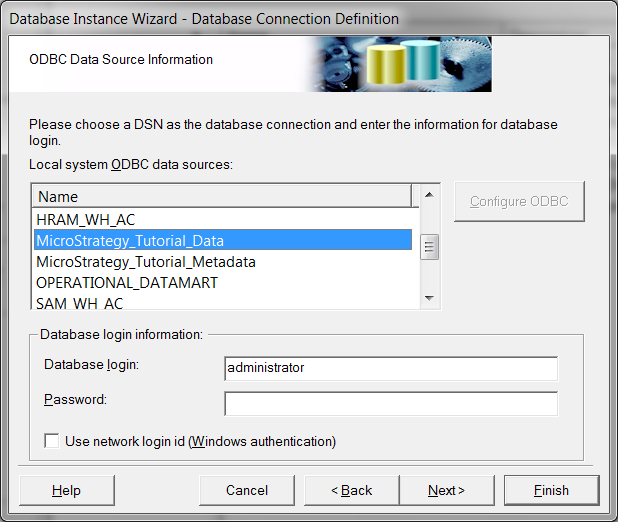
Choose the ODBC DSN –> Give the database login credentials & Click Next
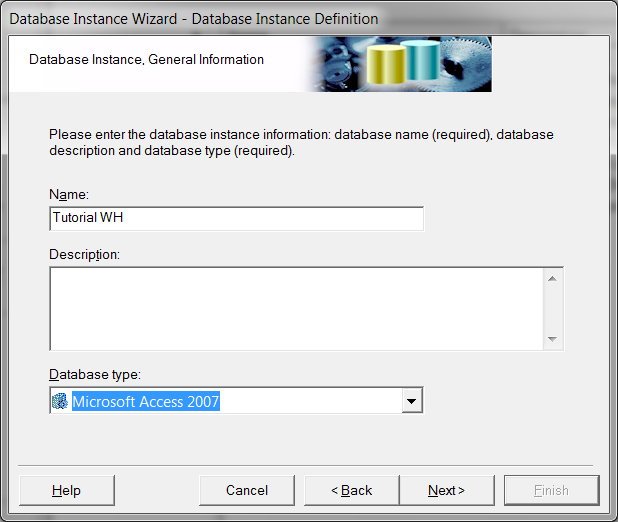
Give the DB Instance name / Driver to which database resides & Click Next

Then, you will get the WH Catalog with available tables where in you can select the required tables from left pane to right pane…
–> Read the warehouse catalog if tables are not shown “Thunder” symbol at top would do this
–> Save & Close after moving the required tables ( So that it gets added to Metadata for future object creation for us later using it 🙂 )
–> Take care of Read Settings here for few dbs where in schema name needs to be passed & you might need to provide the MD query to fetch the tables from dbs
–> Take care of the table prefixes if required
–> Take care of the table structure if needed
–> Take care of updating the table structure ( whenever needed –> Provided no dependencies, else will throw error )

Few Options for a table in WH Catalog are shown below,

Once, this is done, the second step is done now.


You can review at last the list of facts created & click Finish to proceed
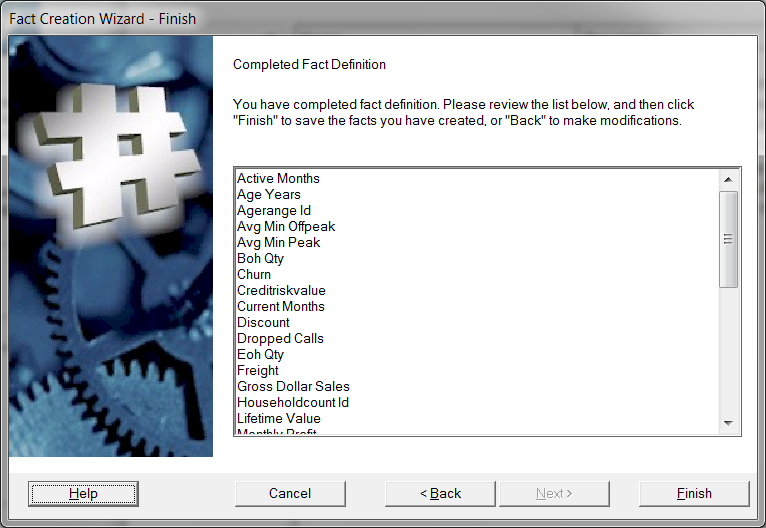
It gets processed at back-end and create those facts selected ( simple facts )

So, now project object/WH tables/Facts are done. Next is to create simple/complex attributes using the Attribute creation wizard

Generally wizard purpose is to build many simple objects quicker rather than creation them using the editors..
–> Create attributes—Enables you to use the Attribute Creation Wizard to create basic attributes
Below is the image that shows how attribute creation wizard looks like, set the rules as how we set for Facts wizard…

The Rule can be set as per our need & the naming conventions as well..

Below is the pane where in we can create the simple or complex attributes using this wizard.. But advisable to create complex attributes using Attribute Editor 🙂 rather than using this…

–> Architect—Enables you to open the Architect graphical interface
Finally the Architect interface shows you all the available tables/facts/attributes created so far… You can use them at any point of time even apart from the project creation assistant… It will be available in the Schema menu at top of Desktop client ….

After clicking Finish, you will be able to see the tables that are added to the project as shown below

Then the facts/attributes that are created…
